Installation and Configuration of Python and VSCode
Recap
In the last article we learned how to derive the linear interpolation formula. With this formula we are able to approximate values not listed within our reference drag coefficient tables. At this point we have learned all of the mathematical concepts to create the calculator, now we need to prepare for programming it.
Overview
For our implementation of the ballistic calculator, we will be using the Python programming language to create the code. This programming language is well suited to beginners and keeps with the spirit of this series of articles.
In this article we will cover:
- Installing Python (Windows)
- Installing Visual Studio Code (VSCode)
- Installing Python Libraries
Installing Python (Windows)
This article will cover how to install Python for Windows. Python can also be installed on Mac and Linux, however, we will only cover the Windows installation in this article.
We will be using Python version 3.8.10 in this article. If you choose to use a newer version of Python, there could be incompatibility issues with the libraries we will be installing. To install Python, navigate to the Python.org downloads page.
Download the Windows Installer (64-bit) and run the .exe file that is downloaded.
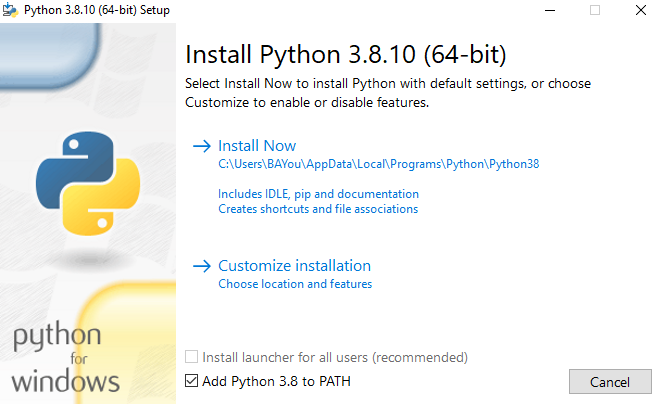
You will see a screen like this, make sure to select the option Add Python 3.8 to PATH. Note the location where Python is being installed to, we will be using this later.

After the installation is completed, exit out of the window.
Installing Visual Studio Code (VSCode)
The next program we will be installing is VSCode. This is an IDE (Integrated Development Environment), you can think of this application as a Microsoft Word equivalent for programming.
Navigate to the Visual Studio Code website and download the installer for Windows. Once again, click the .exe file and finish the installation.
Install Python Libraries
The last thing we need to learn to finish setting up Python is how to install Python libraries. A library can be thought of as pre-programmed code that you can install for extra functionality. In our case, we will install a library that provides the ability to output charts. This will be helpful when we want to visualize the trajectories we calculate.
To install a library, we will need to navigate to the location that Python was installed using the command line (you should have made a note of this from a previous step).
To open the command line, type cmd in the windows search bar.
It should open up a window like this:

To navigate in the command line, we use the command cd.
cd (change directory) allows us to move through folders/directories on the computer's hard drive.
The next step is to navigate to the location we noted from the Python installation window above. In my case the I would type this into the command window (your location may be different):

This takes me to the folder containing the Python installation.
Once in this location, the command line will update the path showing which directory it is currently in:

Now, we need to install the Python library using the "pip" command.
We type:
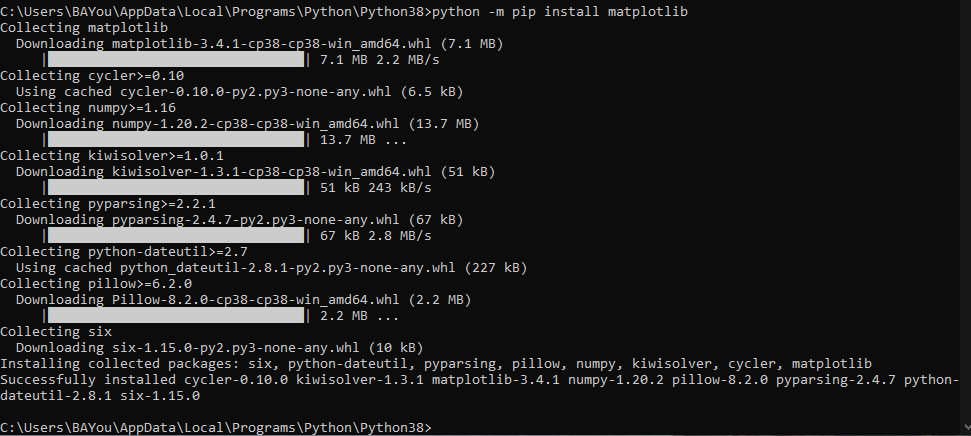
python -m pip install matplotlib

This will install the matplotlib library for use in our programs later. Here is the successful installation message:

Configuring VSCode
For our next step, open up VSCode and lets create a Python file.
Click File -> New File
In this new file, we will type:
print("Test")
Go back into the File menu, and click Save All. Create a new folder somewhere convenient (Desktop?) and name the file tutorial.py. Here is my folder and file:

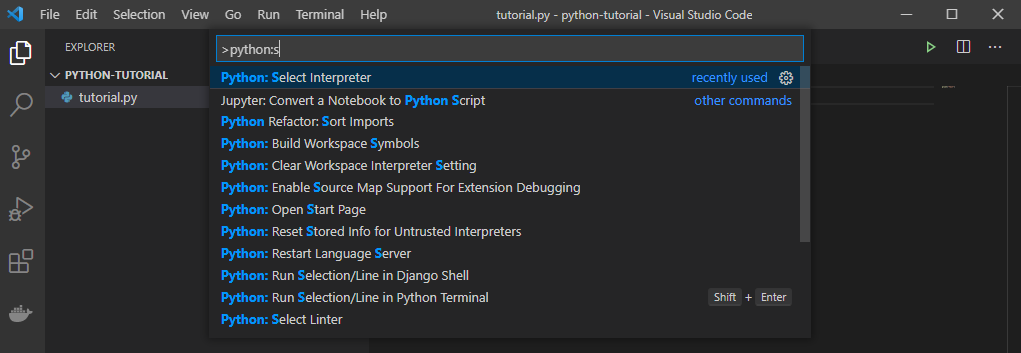
Now, returning to VSCode, go to the View menu on the top. Select Command Palette.
Type python:s
Select the option: Select Interpreter

This will bring a drop down menu, select Python 3.8.10.
Once this is completed, we have fully configured both VSCode and Python to work for our programs. In the next article we will discuss Python fundamentals so we can get started building our ballistic calculator.